Tuesday 25 February 2014

Colour colour colour

One of the biggest problems I've found when people ask me to paint a piece of furniture for them, is which colour to use. Now clearly I don't mean a problem like starving orphans in Africa, or lest we forget the flood victims of Somerset, but it is a problem none the less.

The issue is lots of people look at the colour chart and pick a lovely colour, but then by the time you've covered a whole piece in Henrietta (a light mauve, but on the pink side) the piece only looks suitable for a 6 year olds princess themed boutique. 

Can you see Henrietta, looks gorgeous and subtle now doesn't it? Trust me you do not want a wardrobe this colour (unless you are an actual Disney Princess-then it's fine). A Vintage French console table however, completely different story.

So, what's the solution? Well, my fantastic powers of persuasion obviously help, but even they are not always enough. The thing is when you look at a a colour chart of a 1 inch block lots of colours look fantastic, but then imagining them on a larger scale in a room, certain colours just don't work. So I've I died I'm going to need something more than a colour chart. 

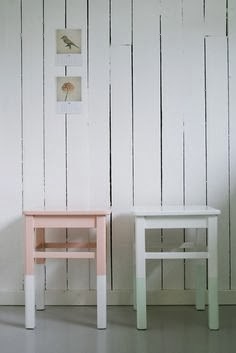
Lots of painters, designers and suppliers use lots of different props to show their clients what colours they have and now the time has come for me to to do the same! But what to chose? The list is endless and I'm still a bit stuck, here as some of the ideas others already use (courtesy of Pinterest):

Wooden block- Simple, do the job. 

Dark & Clear wax versions of make colour-genius

Who doesn't love anything involving a painted spoon?

Very clever use of colour all with different tones - not sure I have enough spare brushes to carry this look off though?

Looks amazing, but as a long term solution I don't think I can justify painting a new wall every other year.

This is my favourite, but again not overly practical...

So, lovely blog readers, what do you suggest? I'd love to hear what you think works best, or what ideas you have. I guess the only criteria really is that whatever I chose it really has to be wood. 

Verity x

Monday 24 February 2014

Coffee Tables. Who knew...

That there is actually a proper way to style your coffee table! I don't mean where to have it, or which table to choose, oh no; I mean what actually goes on your coffee table and where on your table it should go. There are people's entire careers dedicated to coffee table styling. I am clearly in the wrong job. 

Now here are some beautiful coffee tables: 

The key is layers and a mixture of textures

Great use of books

Let's be honest any coffee table with macaroons is a winner

Match your books to your flowers - genius. 

Start with a double layer table and you're already half way there

You know what a sucker I am for upcycled items. This is awesome. 

The bonus of these books are that no one can question your artistic vision as you are clearly an expert. 

There is absolutely no denying it. They are all gorgeous. So, how do you attain a coffee table worth such adoration? Here's some simple tips:

Flowers - fresh preferably, silk acceptable, carnations never. Probably large buds are best with short stems. 

Something tall - I suppose you could use the flowers, but if you remember that your table will be admired mainly from a seated position, a better "tall" object would be an interesting piece of art or sculpture perhaps...you know something really precious so that when I can visit my toddler can wreck it and we never have to speak again. 

Books - obviously. Who doesn't want to how off their artisitic, creative, intellectual, hilarious side with a choice selection of books. Again, I would suggest the bigger the better and pile them up. I've been advised that two piles o books diagonally aligned to each other balance the table out. So there we go.

Trays - this year it's all about layers and a tray helps with this and if you leave enough room people can put their cups on it. That is if its not full of more priceless artefacts. 

Coasters - apparently people with good coffee table styling do not use coasters. It's very embarrassing if you spoil your look with aug practicalities. You've been warned, just don't do it. 

Now, you may sense a small note of sarcasm in my voice. I apologise. When I started this post I believed everyone should have a beautiful coffee table, perfectly styled and exquisite. But as I continued searching and hunting for all these beautiful tables I realised, this is never going to happen. Well not in the near future anyway. 

When you have a baby and a cat and a dog, the nearest I can get to styling my coffee table is a pile of "that's not my puppy" books, various remote controls (some work the machines in the room-half don't work at all) a pencil, blunt to avoid injury, the baby monitor (yes still) and various other crucial pieces that rotate on a daily basis (favourite toys, half written shopping lists, and a constant mug of cold, half drunk coffee). 

So while I will strive on a daily basis for my coffee table to look like the above in all likelihood it will continue to look like this:

I apologise in advance for the use of a coaster. I understand this probably means my 6 page spread in Country Living will now be cancelled. 


On a slightly more helpful note, this has caused me something of a conundrum. It is annoying- we all want our homes to look nice, but there are few of us that can style our coffee tables to achieve this. Lets be honest we all have other things to do and even if we did most of us would be "styling" at least 30 times a day to protect our masterpieces from, well, real life. So what's the answer? I'm not 100% sure yet, but I'm working on it. I'm doing some serious research into practical, (belonging and family friendly) options for coffee tables. I'll post them as part of my The Way to a More Beautiful Home Series. I warn you now though; my table is likely to have coasters on it. 

If you've missed any of the other posts in the series you can catch up here:

Introduction: The Army's on the move...again & Photo Display Ideas


Verity x


Part 1: Need an office without losing a bedroom?

Of course you do! Unless you have too many rooms in your house in which case don't worry about looking at this amazing space solutions for your home office! 

Sacrifice a built in wardrobe:

Now all those in Military Quarters know that one thing you do have (lots of) are built in wardrobes. Clearly all the rage in the 1950s the military have continued the tradition and there are few houses I've come across without at least one in each room. So, this is the plan: keep one spare (make hubby keep his "essential" green kit in a box in the garage) and then you can have your office in it instead! Perfect.

Here are my Top 5 and I think they all work pretty nicely. I think a combination of all will be rather good. 


I'm not going to pretend that there might not be a tiny bit of effort required to obtain an office like above (and maybe some pretty extensive DIY) but, like I said to Major C, we all need to set our sights high don't we? He shrugged and said our next wardrobe will never look like this. So now the gauntlet is down...the next 2 months will be spent solely designing my office/wardrobe-I will keep you all updated on progress. 

Upcycle a Bureau:

These are brilliant if you want to use your wardrobe for clothes (yawn) but still don't want to take up a whole room for your home office. 

They are all lovely. I like the bureau idea but is want one in my hallway, but  I just don't understand where the chair goes? So if you need a chair the hallway is out and I guess you're looking at spare room or dining room maybe? 


Whichever option you go for, one thing is clear; we have a lot of paperwork to "sort". Perhaps I'll go for option 3: a big black bag...

If you missed the intro post to the Way to a More Beautiful Home you can find it here

Verity x

Thursday 20 February 2014

Introduction: The Army's on the move...again & Photo Display Ideas

The sun is shining, the rain has stopped (for today at least) and we have been enjoying the beautiful Rutland Countryside. Now that The Rascal can toddle about dog walking is considerably easier, albeit considerably slower. 

Anyway, as we basked in  the sun I started wondering how long we would have to wait until we dusted off the garden furniture and could start to enjoy some outdoor living again. And then I remembered. By the time its warm enough to enjoy lunch in the garden we will no longer live in this house or in Rutland. In fact we will be somewhere else (who knows where yet) because as is the age old tradition of Army Officers' families around the world, its time for the biannual house swap! 

Well, not a literal house swap. We don't all spy out people's houses and say we'd like that one next please, but its not far off. Army Officers get posted every 2 years ( give or take) and its very rare that posts are within the same area and therefore we move around a lot. 

Now, lots of people in the Army love moving, lots hate it and lots just accept its part of the deal. Now, I think I fall into the love moving group (because I love moving) but Major C does not love moving. I love moving because it means I can rearrange rooms and get things sorted that I haven't done since the last move. Still on the list; frame wedding pictures, print baby pictures, buy a decent bookshelf, throw out all my clothes that don't fit and of course: paint more furniture!!!

But, the thought of our imminent move has got me thinking. The problem with moving around Army Quarters is you know you're never going to be there very long and you have to return each house EXACTLY how you found it - down to the number of the holes in each wall to the length of the grass, and lets not forget washing, ironing and rehanging the revolting Army Issue (always too short) curtains and ensuring you match the identical magnolia crown paint in every single available piece of wall- I will dig you all out some photos to peruse. When you know you're not going to be there long its really easy to simply not bother making your new house a home, its a lot of effort knowing that whatever you do has to be put back next year and you're back to square one, but I believe its imperative to make your house lovely! 

And its more than possible. All it takes is a bit of effort, some imagination and tonnes of enthusiasm, but it is all worth it! So, this is my introduction as to why, and over the next couple of months I'm going to keep you updated as to how our move is going and come May I should be able to show you all our new home! 

As a starter for ten I've been surfing Pinterest (of course) and managed to find some genius ideas for displaying photographs that don't include using a nail and hammer in your precious magnolia walls...I will definitely be pinching some of these.

This is my favourite of all the options, but I'm not sure how toddler/spaniel proof it may be?
This is so easy and looks brilliant & would be an excuse to buy a new desk. Winner. 

  
I am a fan of anything utilitsing wooden clothes pegs

We have so many clip board (why oh why?) but we do, now I can keep them for another 20 year! Whoop. 
Clever & Effective 100% upcycled. 
This is also spectacular - more research required as to where I can find one! 
Beautiful & simple, but shelves will prove problematic for me - normal home dwellers do this though, its wonderful. 
I knew there was a reason why I had 3 vintage ladders in the garage. 
  
Verity x

Thanks for reading the Introduction to The Way to a More Beautiful Home Series - here are the rest of the posts:

Part 1: Need an Office Without Loosing a Room?

Wednesday 19 February 2014

#Craftblogclub Q & A

So, what an exciting and enjoyable evening. Just as a quick recap tonight was the Q & A session, hosted by me on Twitter (very ably assisted by #craftblogclub founder Emma from Frugally Peachy) and as always everyone at #Craftblogclub got involved and we even managed to Trend!! 

So, for those who prefer their answers in more than 140 characters I've expanded here and there will be some more posts coming up in the week to deal with some of the more complicated issues. 


craftblogclub badge

Q: What preparation does wood need before painting?

A: I don't prep many things at all. A quick dusting a prehaps a small sand if there are some really obvious splinters, old paint splodges but pretty much you are ready to go with Annie sloan Chalk Paint! but there are a couple of exceptions:


(i) Teak - I appears that Teak doesn't take very well to Annie Sloan Chalk Paint. I'm not sure why but the wood tends to really suck it up and it can take layer after layer and still look lime washed. (I know from bitter experience). This isn't necessarily a problem, but something worth remembering if you have a specific idea for a piece in mind.


Pic from Second Life Sally (via Pinterest)
If you want a solid, block colour finish like this cabinet, then I would suggest using a couple of layers of paint and then both a dark and clear wax to finish (more on next blog post).

But you have a piece made of Teak, then even if you did 5 layers, it might look like the table and chair below.  
Pic from Annie Sloan

It still looks fabulous, but it is a very different finish to the cabinet. This is far more rustic (although I'm not 100% sure I think its likely that this table is teak. 


(ii) MDF - or any untreated wood. Obviously you can just apply an ASCP undercoat, but this can become unnecessarily pricey, so I suggest just buying a cheap undercoat and using this as a base for untreated wood and then paint as normal. 


Q: I've just waxed our table but has left a strange feel to it, I'm presuming I've not rubbed it in right?


A: I tend to think of waxing a piece as a whole separate task to the painting. With ASCP people tend to find the waxing the hardest part, but its not too tricky, there are some simple tips that I find really help with the clear wax:


(i) Try applying wax using a brush, rather than a cloth. You get a more even layer and its easier on the arms.

(ii) Try and leave it at least 24 hours before you buff.


(iii) Get a really soft cloth for buffing, and most importantly make sure it is lint free. An ideal item for buffing is a high thread count old pillow slip. Or a good quality, old shirt.


(iv) Buff quickly in small circles. This is amazing for the bingo wings.


iv) If you can bare it a second waxing makes the world of difference and really protects your piece. So I would recommend repeating (i) to (iv) if you can. (Just think about getting those arms summer ready!)

(Photo from Cottage Instincts Blog)

Q: I applied AS clear wax to a piece I'd just painted, but it took some of the paint off. User Error?


A: If you rub the wax in using the same pressure on an edge as you do on the flat surfaces you will find that the edges will more than likely rub away the paint as well as buff the wax.You get a lovely finish but it can be frustrated if you didn't want a distressed look. 


That said the solution is to not rub too hard on corners and edges or to simply make it part of your design. It can be useful as it only comes away where the piece would naturally get bashed anyway. It also enhances the shape and can bring out detail.


If you really don't want any of the paint removed though you can try and build up the paint on these area, so that when you buff it merely sands down the extra paint, rather than rubbing it away!


This piece the customer did NOT want distressed at all.

But this piece looks far better with edges distressed.

I could literally spend all evening talking about wax, so this week I will be dedicating a whole post ( with pics) to waxing and varnishing pieces with how I do it - I'll add the link when its up.

Q: I want to write on my upcycling project - freehand pen, any suggestions on the best way to achieve this?

A: There are loads of different ways you can apply text or pictures to your upcycled pieces. If you have a tremendously steady hand (and possibly a degree in fine art) you could get a tester pot of ASCP in Graphite, a thin brush and just go for it. But for the rest of us mere mortals here are some other suggestions:


(i) Utilising Printables: A brilliant website called The Graphic's Fairy has every possible vintage/antique image you can ever want and even better than that loads of tutorials about how to use the free printables. You can use any of the images on your projects you simply have to credit image back to The Graphics Fairy.


(ii) You can either use the printables like decoupage and stick directly onto furniture - sounds awful, but with the right wax and finish looks entirely lovely. 


(iii) Stencils: You can use the printed images on card and then cut around image to make your own stencil. If this sounds far too complicated The Royal Design Studio Stencils have some gorgeous stencils that work brilliantly and can be bought from their Etsy store.


(iv) Stickers are another option. There are lots around and these are fail safe and rarely look like stickers if they "fit the piece". This may be my recommendation if you wanted script and were unsure.


(v) If you were really brave though and not too maverick you could have a go in pencil and then decide if you wanted to go over it in paint with a thin brush or with a permanent marker. The downside of using the marker is I have found it smudges when you wax it so you need to varnish rather than wax. Here's a link to my post about using Varnish on your pieces


Table with decoupage Image from Graphic's fairy and waxed top. 

Amazing stencils from Royal Design Studio


Ok, so hopefully thats a quick taster for you guys to get started at the very least. I'm very excited about seeing everyone's projects. Remember please just drop me a line on here, Twitter or Facebook if you've got anymore questions and I'll do my best to help! 


Verity x


PS: While we are here- all these answers are from my personal experience. I do a lot of upcycling, but I wouldn't claim to be The Oracle! I don't work for or get any kick backs from Annie Sloan, so I don't think I am bias, but I do love using her paints! So rest assured this is not just me plugging all her products, its just I genuinely do think they are great! The same goes for any other products I mention. 


Sunday 16 February 2014

Question Time

I am not anticipating that this will be in any way shape or form like its television namesake. However, I am genuinely looking for all your paint related questions. 

The idea (as you can read about in the post below) is to create a useful Q & A guide to run alongside my "How to..." guides - I'm going to start with hand painting furniture, but know knows where I might branch out to.

Anyway, please comment either on here or on the Facebook link if that's easier for you and I will endeavour to answer your questions as thoroughly and quickly as I can. 

In the meantime I'm going to kick back in my lovely drawing room and await your questions with a lovely glass of White Burgundy. 

             Photo courtesy of Period Living Facebook on.fb.me/1lXGTRg
Who am I kidding? I live in a British Army Married Quarter - we don't have a drawing room, we have a sitting room - that looks, well, very unlike this! But we can all dream eh?!


Tuesday 4 February 2014

#Craftblogclub "I Re-Love You"

Wowsa. You leave Twitter for a few weeks and the craft blog world explodes!  

Thanks to all Emma's hardwork from http://www.frugallypeachy.co.uk what started as a few crafters chatting has turned into a crafting-trending phenomenon! 

Anyway, each month there is a challenge and this month is right up my street- "I Re-Love You"  http://frugallypeachy.co.uk/2014/02/04/192/

So, there are Loads of questions flying around Craft Blog Club and my typing and limited characters is not helping very much, so if you have Upcycling need to know questions -especially regarding Annie Sloan paint- just comment on this post and I will answer and then drag them altogether in a handy Upcyling Guide!

Good night and Happy Crafting to you! 


Sunday 2 February 2014

Hello Again strangers and welcome to Coral

I must apologise for my utter absence since November. I'm afraid life got in the way a bit, but we're all under control now!

Maj C is back from his holidays and the Rascal is up and about (ALL the time, since she has learnt to walk) and my exams are over and I am happily back painting!

Not much to report on the painting front yet, but I have been spending an extraordinarily large amount of time on Pinterst getting some Pinspiration for 2014. I'm not sure any of my browsing has produced any real legitimate thoughts yet, but I'm working along the lines of Spring....lovely pastels and lots of spring colours! I'll be back when I've done something worth seeing (I hope)!

Sorry, forgot to say, my new favourite colour is.........CORAL. Its bascially, amazing.